DIY solar panels are a realistic option for UK homeowners who want to power a shed, caravan, motorhome, or garden outbuilding without paying for professional installation. With the right components and a bit of practical knowledge, building a working off-grid solar system is well within the capability of anyone who’s comfortable with basic electrical work. The key is understanding where DIY is appropriate and where you need a qualified professional.
The honest answer is that genuinely DIY solar, where you assemble, install, and connect a system entirely yourself, works well for off-grid low-voltage (12V or 24V) applications. For grid-connected home solar, UK law requires MCS-certified installation for most incentive eligibility, and Part P of the Building Regulations requires that mains-voltage electrical work is carried out by a competent person. But for a shed, caravan, or outbuilding powered entirely from solar with no grid connection, DIY is legal, practical, and cost-effective.
If you’re interested in a fully installed solar system for your home, our MCS-certified team can provide a free quote.
Contents
- 1 Key Takeaways
- 2 What Can You DIY vs What Needs a Professional?
- 3 DIY Solar System Components
- 4 Step-by-Step: Building a DIY Shed Solar System
- 5 DIY Solar Kits
- 6 Can You DIY a Home Rooftop Solar System?
- 7 Case Study: DIY Motorhome Solar Build in Yorkshire
- 8 Expert Insights From Our Solar Panel Installers About DIY Solar
- 9 Frequently Asked Questions
- 9.1 Is it legal to install solar panels yourself in the UK?
- 9.2 How much does a DIY solar system cost?
- 9.3 Can I build my own solar panels rather than buying them?
- 9.4 Do I need planning permission for a DIY solar installation?
- 9.5 Will a DIY solar system qualify for Smart Export Guarantee payments?
- 9.6 What’s the difference between a DIY kit and buying components separately?
- 9.7 What’s the best battery for a DIY solar system?
- 9.8 Should I use PWM or MPPT charge controller?
- 10 Summing Up
Key Takeaways
- DIY solar works well for off-grid 12V/24V systems, sheds, caravans, outbuildings, garden lighting
- Grid-connected home solar requires MCS-certified installation to access Smart Export Guarantee payments
- Mains-voltage (240V) wiring from an inverter must comply with Part P Building Regulations
- A complete DIY off-grid shed system costs £300-700 depending on size and components
- The four core components are: solar panel, MPPT charge controller, battery, and (if you need 240V) an inverter
- LiFePO4 batteries are strongly recommended over lead-acid for any DIY system
What Can You DIY vs What Needs a Professional?
Understanding this distinction is the most important part of planning a DIY solar project in the UK.
What you can DIY without certification: Any low-voltage (12V or 24V) off-grid system with no connection to the mains grid. This covers: shed and outbuilding solar, caravan and motorhome solar, garden lighting systems, boat solar, and any standalone battery system powered solely by solar panels. These systems operate at safe low voltages and have no interaction with the UK grid or your domestic wiring.
What requires a qualified electrician: Any connection to your domestic consumer unit or the 230V mains grid. If you want mains-voltage (240V) sockets in your shed powered from an inverter, the wiring from the inverter to those sockets must comply with Part P. You can self-certify under Part P if you are yourself a “competent person,” but most homeowners prefer a qualified electrician to check or install this element. For a full home grid-tied solar installation, MCS certification is required to register the system and access SEG export payments.
DIY Solar System Components
A DIY off-grid solar system uses the same components as a professionally installed one, the difference is who sources, assembles, and installs them.
Solar Panels
Monocrystalline solar panels are the best choice for a DIY UK system. They’re more efficient per square metre than polycrystalline types and perform better in the diffuse light conditions common in the UK. Panel sizes of 100W to 400W are all widely available from UK suppliers. For a shed or small system, 100-200W is usually appropriate. For a caravan or motorhome, 100-160W rigid panels (or flexible panels if you have a curved roof) are standard.
Panels sold in the UK include a 25-year performance warranty from reputable manufacturers. Buy from established UK solar suppliers rather than unknown marketplace sellers to ensure genuine rated output and reliable warranty support.
MPPT Charge Controller
The charge controller regulates the power from the panel to the battery, preventing overcharging and managing the charging profile. Always use an MPPT (maximum power point tracking) controller rather than the cheaper PWM type, MPPT is 10-30% more efficient at extracting energy from the panel, especially in low light. A 20A MPPT controller handles most small DIY systems (up to about 300W into a 12V battery) and costs £25-50. Larger systems need a higher amperage controller sized accordingly.
Battery
LiFePO4 (lithium iron phosphate) is the recommended battery chemistry for any DIY solar build. It provides 80-90% usable capacity (vs 50% for lead-acid), lasts 8-15 years (vs 3-5 for AGM), handles partial charging and discharging gracefully, and is far safer than NMC lithium chemistry. A 100Ah LiFePO4 battery costs £150-300 and is the right size for most single-panel shed systems. For a caravan or motorhome, many users run 100-200Ah to support fridge, lighting, and device charging.
Inverter
If you only need 12V power (for LED lighting, 12V car-style chargers, 12V USB hubs), you don’t need an inverter at all, these run directly from the battery. If you want standard 240V mains outlets, you need a pure sine wave inverter. A 300W pure sine wave inverter (for lighting and small appliances) costs £40-70. A 1,000W or 2,000W unit (for power tools) costs £70-150. Always choose pure sine wave, modified sine wave is cheaper but can damage sensitive electronics and cause problems with motors.
Cabling and Connectors
Use 4mm² solar cable for panel connections and correctly rated cable for battery-to-inverter runs (typically 10-25mm² depending on current). MC4 connectors are the standard weatherproof connectors used for solar panel wiring, use genuine MC4 connectors, not cheap copies, as poor connections cause resistance heating and potential fire risk. Include a fuse or circuit breaker on the positive battery terminal (within 300mm of the battery) as a safety measure.
Step-by-Step: Building a DIY Shed Solar System
This walkthrough covers a typical 200W off-grid shed system, one panel, MPPT controller, 100Ah LiFePO4 battery, and a 1,000W inverter for mains sockets.
Step 1, Plan your load and confirm your components. Calculate your daily energy use (see our shed solar sizing guide for detail). Confirm that your panel wattage, controller amperage rating, and battery capacity are correctly matched.
Step 2, Mount the solar panel. Install the panel on your shed roof using a tilt frame mount for maximum output angle (30-40° is ideal). Use stainless steel fixings and seal any roof penetrations. Aim for south-facing orientation; east or west reduces output by 15-20% but is perfectly workable. Run the solar cable through a weatherproof cable gland into the shed.
Step 3, Install the charge controller. Mount the MPPT controller on the shed wall, away from direct sunlight and heat. Wire the panel cables to the controller’s PV input (observe polarity, positive to positive, negative to negative). Connect the battery to the controller’s battery terminals before connecting the panel, most controllers require this sequence.
Step 4, Connect the battery. Place the LiFePO4 battery in a stable location. Connect positive and negative cables from the controller. Install an inline fuse (40-60A for a 200W/12V system) within 300mm of the battery positive terminal. Many LiFePO4 batteries include a built-in battery management system (BMS) that handles overcharge and over-discharge protection automatically.
Step 5, Connect the inverter (if needed). Run heavy-gauge cable (10mm² or larger for a 1,000W inverter) directly from the battery terminals to the inverter. The inverter should be as close to the battery as possible to minimise voltage drop. Install a fuse or circuit breaker rated to the inverter’s maximum current draw. The 240V output of the inverter connects to your shed’s consumer unit or sockets in the same way as any mains supply, this wiring must comply with Part P.
Step 6, Test and monitor. Most MPPT controllers have a display showing panel input voltage, battery voltage, and charging current. Check that these read correctly after connecting. Many modern controllers also have Bluetooth monitoring apps. Verify that the battery charges correctly in daylight and that loads draw as expected.
DIY Solar Kits
Pre-packaged DIY solar kits are widely available from UK suppliers and include all the components you need in matched, compatible sizes. These remove the guesswork of component selection and usually include cables and connectors. Common kit sizes:
A basic 100W kit (panel, PWM controller, basic battery connections) costs around £100-150 and is designed for very light loads. A proper 200W MPPT kit (panel, MPPT controller, sometimes with a battery) costs £200-400. Complete shed kits (panel, MPPT controller, LiFePO4 battery, inverter, cabling) start at £400-700 for a 200-400W system.
Kits are a sensible starting point if you’re new to solar. Buying components separately gives you more flexibility and often better value once you know what you need.
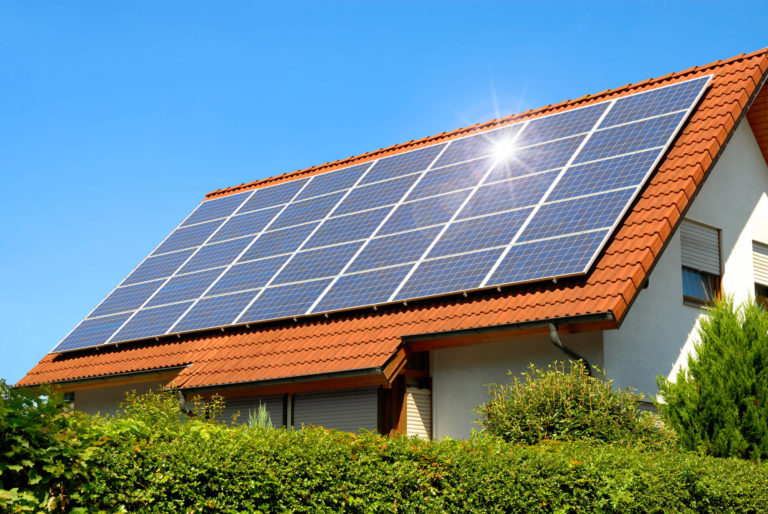
Can You DIY a Home Rooftop Solar System?
Technically yes, but practically it’s rarely advisable for a full grid-tied system in the UK. Here’s why:
To access Smart Export Guarantee (SEG) payments, which are the primary ongoing financial benefit of home solar, your system must be installed by an MCS-certified installer. Without MCS certification, energy suppliers are not obliged to pay you for exported electricity, and you lose a significant part of the financial case for solar.
MCS certification also provides a warranty backstop. If the system underperforms or has defects, MCS gives you a formal complaints and redress route. A self-installed system has no such protection.
Beyond the financial and warranty considerations: working on a pitched roof at height is a serious safety risk without proper equipment and training. Home rooftop solar almost always requires scaffolding, working at the roof edge, and handling heavy panels. Rooftop installation injuries are a significant cause of serious accidents. This is not an area to cut corners on safety.
For a grid-connected home solar system, use an MCS-certified installer. The SEG income alone typically covers the cost premium over a self-install, and you get a professionally warranted system that adds verified value to your property.
If you’re renting or lack roof access, plug-in solar panels are worth exploring. These balcony-mounted units need no wiring or permissions and let renters and flat owners generate solar electricity without any structural work.

Case Study: DIY Motorhome Solar Build in Yorkshire
Background
A retired couple in Harrogate converted a panel van into a motorhome and wanted a solar system to power 12V fridge, lighting, laptop charging, and a small inverter for a coffee maker. They had moderate DIY skills and were comfortable with basic electrical work.
Project Overview
After calculating their daily load at approximately 500Wh, they decided on a 320W panel installation (two 160W semi-flexible panels on the van roof to avoid wind resistance at motorway speeds), a 40A MPPT controller, two 100Ah LiFePO4 batteries wired in parallel for 200Ah total storage, and a 1,000W pure sine wave inverter.
Implementation
Total component cost was approximately £750 including all cabling, connectors, and a basic 12V wiring loom for the vehicle. They spent two weekends on the installation, routing cables through the van’s existing cable runs and mounting the controller and batteries in a secure bay behind the driver’s cab. A local auto-electrician checked the final installation for £80, giving them peace of mind on the mains inverter wiring.
Results
The system exceeded expectations across three seasons of touring. The 200Ah LiFePO4 storage provided 3-4 days of off-grid autonomy even in autumn. The fridge ran continuously without issue and the inverter handled the coffee maker without problem. They estimated the DIY approach saved approximately £1,200-1,500 compared to having a specialist fit a comparable system.
Expert Insights From Our Solar Panel Installers About DIY Solar
One of our senior solar panel installers with over twelve years of experience comments: “I’m genuinely supportive of DIY solar for the right applications. A 12V off-grid shed or caravan system? Absolutely, if you can wire a plug and follow instructions, you can build a working system. The part where people get into trouble is when they try to DIY a home rooftop grid-tied system to save money on installation. You lose the SEG payments without MCS, you lose your roof warranty if you’ve drilled through it without a professional, and you’re working at height without the right equipment. For a home installation, the maths just don’t work in favour of DIY once you factor in what you lose. But for off-grid? Crack on.”
Frequently Asked Questions
Is it legal to install solar panels yourself in the UK?
Yes, for off-grid low-voltage systems (12V/24V with no grid connection). For mains-voltage work including inverter sockets, compliance with Part P of the Building Regulations is required, you can self-certify if you are a competent person, or have a qualified electrician check the work. For grid-tied rooftop solar, MCS-certified installation is required to access Smart Export Guarantee payments.
How much does a DIY solar system cost?
A basic 100W shed system with a lead-acid battery costs around £130-200 for components. A 200-400W system with LiFePO4 battery and inverter costs £400-700. A caravan/motorhome system with 320W panels, 200Ah LiFePO4 storage, and 1,000W inverter costs approximately £700-900 in components. Compare this to professional installation of equivalent systems which typically costs £1,500-2,500.
Can I build my own solar panels rather than buying them?
Technically possible but not recommended. Solar cells are available to buy individually, but assembling them into panels requires specialist lamination equipment and skills to achieve adequate weatherproofing and long-term reliability. Commercially made panels are inexpensive, carry 25-year performance warranties, and are made to IEC standards that self-made panels cannot match. Building your own cells is a learning exercise, not a cost-saving one.
Do I need planning permission for a DIY solar installation?
For a standalone off-grid system on a shed or outbuilding, no planning permission is required in most cases. For rooftop solar on your home, panels are permitted development unless your property is a listed building or in a conservation area, or if the panels extend beyond the roof plane. Always check with your local planning authority if unsure.
Will a DIY solar system qualify for Smart Export Guarantee payments?
No. SEG payments are only available for systems installed by MCS-certified installers. If your primary goal is generating electricity for your home and earning export payments, a professional MCS-certified installation is the route to take. For off-grid shed or caravan solar, SEG doesn’t apply anyway, you’re not connected to the grid.
What’s the difference between a DIY kit and buying components separately?
Kits are pre-matched so you know the components work together and are correctly sized. They’re ideal for beginners. Buying separately gives more flexibility, you can optimise each component for your specific needs and often get better value once you know exactly what you need. For a first build, a kit is the lower-risk option; for a more experienced builder, sourcing components separately often makes more sense.
What’s the best battery for a DIY solar system?
LiFePO4 (lithium iron phosphate) is the clear winner for any DIY build where you want reliability and longevity. It provides 80-90% usable capacity, lasts 8-15 years, handles partial charging gracefully, and includes built-in battery management. Lead-acid (AGM or gel) is cheaper upfront but only gives 50% usable capacity and lasts 3-5 years. For a system you want to last a decade, LiFePO4 is worth the extra investment.
Should I use PWM or MPPT charge controller?
Always MPPT for any UK installation. MPPT controllers are 10-30% more efficient than PWM, particularly in the partial shade and low light conditions common in the UK. The price difference is small (MPPT costs £5-20 more for a basic unit) and the efficiency gain over years of operation more than covers it. PWM is only justifiable for the very smallest and most cost-critical systems.
Summing Up
DIY solar is a genuinely viable and satisfying project for the right application. For sheds, caravans, motorhomes, and other off-grid uses, a DIY build with correctly matched components will perform just as well as a professionally installed one at a fraction of the cost. Understand the limits, keep it off-grid and low voltage for a simple, legal, straightforward build, and invest in a quality LiFePO4 battery and MPPT controller to ensure the system works reliably for years. If your goal is home rooftop solar with grid export, the MCS route is the right one for both legal compliance and financial returns. Our MCS-certified installation team can provide a no-obligation quote for home solar if that’s the direction you’re heading.
Updated