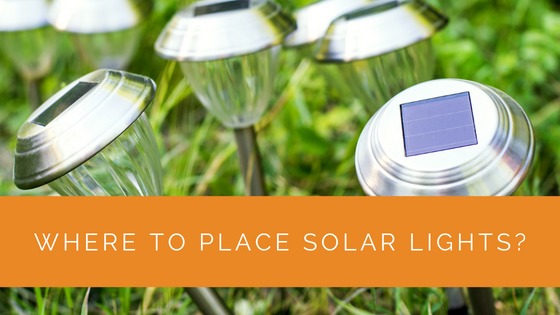
Placement is everything with solar lights. Install them in the wrong spot and they’ll charge poorly, produce dim light, or fail entirely. Even high-quality solar lights won’t perform if they’re stuck in shade or positioned where the panel misses daylight hours.
The good news: once you understand how sun moves through the UK sky and what blocks charging, you can place solar lights strategically for reliable performance. This guide covers positioning for maximum charge, optimal light distribution, and practical garden layouts.
Contents
- 1 Key Takeaways
- 2 Understanding UK Sun Movement
- 3 Direct Sunlight vs Shade
- 4 Avoiding Shadows and Obstructions
- 5 Seasonal Light Hour Variation
- 6 South-Facing Placement Strategy
- 7 East and West-Facing Considerations
- 8 The Edge of Cloud Effect
- 9 Pathway Light Placement
- 10 Security Light Positioning
- 11 Flood Light Placement
- 12 Decorative and Ornament Light Placement
- 13 Case Study: Designing a Solar Light Garden Layout
- 14 Expert Insights From Our Solar Panel Installers About Solar Light Placement
- 15 Frequently Asked Questions
- 15.1 Can I place solar lights in partial shade?
- 15.2 How many hours of sunlight do solar lights need?
- 15.3 Do solar lights work on north-facing walls?
- 15.4 Should I remove solar lights in winter?
- 15.5 What’s the best direction for solar lights to face?
- 15.6 How do I know if my solar light location gets enough sun?
- 15.7 Can shade from trees improve solar light performance?
- 15.8 How high should security lights be mounted?
- 16 Summing Up
Key Takeaways
- South-facing locations offer the most consistent charging year-round in the UK, receiving sunlight throughout the day
- East and west-facing spots work well for summer but receive less winter sun due to lower UK sun angle
- North-facing locations receive only diffuse light and are unsuitable for solar lights
- Solar lights need 4-6 hours of direct or bright indirect sunlight daily to charge adequately
- Shade from trees, buildings, or fences reduces charging efficiency by 50-90% and must be avoided
- Edge of cloud effect (bright edges around clouds) can actually speed charging compared to uniform cloud cover
- Stake-mounted lights work best along pathways; wall-mounted versions suit fences and house exteriors
- Security lights should be positioned 2-3 metres high to maximise motion detection range and light coverage
- Flood lights need clear line of sight to the area you want illuminated
- Decorative and ornament lights can be placed anywhere visible, as long as the solar panel gets sufficient daylight
Understanding UK Sun Movement
The UK sun moves differently depending on the season. In December, the sun barely rises above the horizon, tracking a low arc from southeast to southwest. By June, it’s much higher, rising in the northeast and setting in the northwest.
This has major implications for solar light placement. A spot that receives 8 hours of direct sun in summer might get only 2-3 hours in winter because the low winter sun is blocked by roof eaves, garden walls, or distant trees.
For year-round solar light performance, south-facing locations are essential. They receive the most sunlight in both summer and winter. In summer, a south-facing panel might receive 12+ hours of sunlight. In December, it still receives 4-6 hours, which is the minimum needed for adequate nightly light.
East and west-facing locations work well but have a seasonal trade-off. In summer, an east-facing spot catches morning sun beautifully. But in winter, as the sun track shifts south, it receives little to no direct light. West-facing is similar but reversed.
Direct Sunlight vs Shade
Solar lights charge best in direct, unobstructed sunlight. But they also charge in shade, just much more slowly.
Direct sunlight provides 100% light intensity. Underneath a large tree with dense leaf cover, light intensity drops to 10-30% of full sun. The light is still bright enough for you to see clearly, but the solar panel struggles. What takes 6 hours to charge in direct sun might take 20 hours in dense shade.
Partial shade is the middle ground. Light dappled through tree foliage, or light from a bright north-facing wall, provides 30-70% intensity. Your solar light will charge, but slower than in direct sun.
Completely dark areas (deep tree shade, under structures, inside covered porches) provide almost no charging. Solar lights left in these spots will deplete over several nights and eventually die.
The solution is positioning: find the brightest spot available, even if it’s not perfect. A south-facing border might receive direct sun from 9am to 3pm in winter – that’s sufficient for adequate charging.
Avoiding Shadows and Obstructions
When scouting locations, check not just where the sun is now, but where it will be throughout the year. A garden area sunny in summer might be shaded in winter by trees (deciduous trees lose leaves, but the branch structure still blocks low winter sun).
Common shade sources:
Buildings: Your house, a garage, sheds, or garden structures cast large shadows. In winter, these shadows extend far further north due to the low sun angle. A patio on the south side of a two-storey house receives good sunlight. A patio on the north side receives almost none year-round.
Walls and fences: A tall fence on the north side of a garden bed can shade it completely. A fence on the south side casts a shadow only in early morning or late afternoon, leaving most of the day sunny.
Trees: Large trees in the southwest corner of a garden might shade the northeast corner, especially in winter when the sun is lower. Deciduous trees (oak, sycamore) lose leaves in winter, improving winter light, but coniferous trees (yew, holly) provide year-round shade. Be cautious with these.
Overhead objects: Pergolas, parasols, or tree canopy directly above a light reduce charging. These are obvious, but easy to overlook if you’re focused on ground-level placement.
Seasonal Light Hour Variation
The UK experiences extreme seasonal daylight variation.
In June, daylight lasts 16+ hours. Solar lights enjoy long charging periods and produce light for 10+ hours at night (if the battery allows).
In December, daylight is just 8 hours. Solar lights must charge fast during limited daylight and run efficiently through a long night.
This variation is why solar light performance feels seasonal. The same light that glows until 2am in July will be dead by 11pm in January. This is normal – not a failure. It’s simply the UK season cycle.
For locations in northern Scotland (around 57 degrees north latitude), summer days are so long that lights don’t turn off until 10-11pm. Winter days are so short that lights turn on at 3-4pm. This extreme variation makes solar lights less practical in far northern locations, though still viable with quality equipment.
South-Facing Placement Strategy
If you have a choice, place solar lights on south-facing surfaces or borders. A south-facing fence line, a south-facing garden bed, or the south side of a house wall are all excellent spots.
South-facing placement means your lights receive consistent sunlight through the day, year-round. Even in December, a south-facing location gets several hours of direct sun. This translates to reliable battery charge and consistent nightly light.
If south is occupied or unavailable, southeast or southwest is acceptable, though light will be slightly less consistent in winter.
East and West-Facing Considerations
East-facing locations receive morning sun but no afternoon sun. In summer, this works well – the lights charge fully before noon. In winter, the lower sun angle means the morning light may be insufficient to fully charge the battery before the long winter night.
West-facing locations are the reverse: afternoon and evening sun, but less morning light. In summer, this is fine. In winter, by the time afternoon sun arrives (if at all), darkness is approaching, leaving little time to charge before the long night.
If using east or west-facing placement, opt for larger solar panels and higher-capacity batteries to compensate for the shorter charging window, especially if you’re placing lights in winter shade zones on these aspects.
The Edge of Cloud Effect
Interestingly, UK solar panels charge well during particular overcast conditions. When clouds are breaking up with sun peeking from the sides, the bright white edges of clouds create intense diffuse light. This “edge of cloud effect” can actually produce more charging intensity than uniform cloud cover, and sometimes nearly matches direct sun.
Conversely, uniform heavy cloud cover provides the least charging. And thick fog reduces light to near-darkness.
This is why UK solar lights continue to charge even on many cloudy days – it’s often the dramatic cloud breaks and edge lighting that keeps charging efficient. Place lights in locations that maximise exposure to these bright periods, not just to occasional direct sun.
Pathway Light Placement
Path lights mark routes and add safety. Place them at regular intervals (1.5-2 metres apart) along the path you want to illuminate. This creates a clear visual guide in darkness.
Offset them slightly from the path rather than directly on it – this avoids people tripping over them and makes mowing easier. A path light 30cm to the side of a garden path works well.
Stagger them on alternate sides if the path is wide or meanders. This creates a rhythmic, attractive line and ensures light falls on the path from multiple angles.
For adequate summer visibility, 5-20 lumen lights are fine. For winter safety, consider 15-30 lumen models to maintain useful visibility during shorter nights.
Security Light Positioning
Security lights should be mounted 2-3 metres high, covering the area you want protected. A motion-sensor light beside a front door should face down and outward to detect approaching visitors before they reach the entrance.
Position security lights where the PIR (motion) sensor has clear line-of-sight to approach routes. If a light is mounted behind a wall or under an eave with its view blocked by plants or structures, the sensor won’t detect motion until the intruder is already past.
A typical security light covers a 5-8 metre range in front and 3-4 metres to each side. Two lights covering overlapping zones are more effective than one.
For charging, a south or southeast-facing wall is ideal for security lights, ensuring they stay charged even in winter when they’re most useful (longer nights mean more detection opportunities).
Flood Light Placement
Flood lights project bright light across larger areas. Mount them 1.5-2.5 metres high on a shed, fence, or house wall, angled to illuminate the space below and ahead.
Ensure the solar panel at the top of the light has full, unobstructed access to daylight. If you mount a flood light under an eave or partially under a roof overhang to save space, the panel will be shaded and won’t charge adequately.
Position the light itself so it doesn’t cast shadows where you want light. A flood light mounted on the southeast corner of a garden sheds faces northwest – shadows fall toward the building, not outward toward the garden.
For patio entertaining, you may use two flood lights on opposite corners to create balanced, even illumination without harsh shadows.
Decorative and Ornament Light Placement
Decorative lights (garden ornaments, string lights, ball lights) can be positioned almost anywhere as long as their solar panel gets adequate daylight. A solar butterfly light in the middle of a flower bed works fine as long as the panel receives 4+ hours of sun daily.
String lights strung across a pergola or fence need the solar control unit positioned where it charges well – not underneath the pergola in shade. Mount the controller on a south-facing fence post or a stake in a sunny corner, then run the string to the shaded pergola above.
Ornament lights that will be frequently moved (seasonal decorations) should be placed in a “charging station” spot: a sunny south or southeast-facing location. Charge them there fully, then move them to less sunny display locations for short-term use.
Case Study: Designing a Solar Light Garden Layout
Background
A property in Hampshire had a long, sloping front garden with a winding pathway and several planted borders. The front of the house faced south. A large oak tree occupied the southwest corner, casting deep shade. The owners wanted to add pathway lighting for safety and accent lighting for ambiance, using solar lights to avoid installation costs.
Project Overview
The team surveyed the garden in winter (the worst case for solar) to identify sunny and shaded zones. South-facing areas received 4-6 hours of direct winter sun. East and west sides received 2-3 hours. The oak tree shadow covered the southwest corner entirely.
Implementation
Pathway lights were placed along the main route in the south and east zones, where they’d receive adequate charging all year. The oak tree zone was left unlit – attempting lights there would mean constant underperformance. Two decorative garden lights were positioned on the south side of the garden where they’d charge well. A motion-sensor security light was mounted on the south-facing front corner of the house, 2.5 metres high, facing down the pathway for motion detection.
Results
In summer, all lights performed brilliantly, running for 10+ hours. In winter, pathway lights produced useful light for 4-5 hours (sufficient for early evening use). The security light functioned reliably year-round. The owners reported zero charging issues because lights were positioned in locations with predictable sunlight. Removing the assumption that every area could have solar lighting and instead tailoring placement to real sunlight availability made the whole system work.
Expert Insights From Our Solar Panel Installers About Solar Light Placement
One of our senior solar installers with two decades of renewable energy experience shared this: “Placement is the single biggest factor in solar light success, and it’s often overlooked. People buy premium solar lights and then wonder why they don’t work well – the light is usually positioned in a spot that barely gets charged. When we recommend solar lighting alongside larger solar PV systems, we always survey the site properly and identify genuinely sunny spots. It takes five minutes, saves years of frustration. The UK’s variable sun and our abundant cloud cover mean placement strategy is critical to success.”
Frequently Asked Questions
Can I place solar lights in partial shade?
Yes, but performance will be reduced. Partial shade (such as dappled light under trees or light from a north wall) provides 30-70% of direct sun intensity. Lights will charge slowly and may not provide full brightness through the night. Budget 20-30% longer runtime in shade, or choose a sunnier location if possible. Deep shade (under dense tree canopy or covered areas) is unsuitable for solar lights.
How many hours of sunlight do solar lights need?
Solar lights need 4-6 hours of direct sunlight daily for adequate charging. In the UK, south-facing locations typically receive this in winter. East or west-facing spots receive 3-4 hours in winter, which may be marginal. In summer, 4-6 hours is easily achieved in almost any location. If you have a location receiving less than 4 hours in winter, choose a brighter spot or use mains lights.
Do solar lights work on north-facing walls?
North-facing locations in the UK receive only diffuse light (indirect, scattered light) and are unsuitable for solar lights. A north-facing wall or fence is in shade for most of the year. Solar lights placed there will charge extremely slowly and provide little light through the night. Avoid north-facing placement if at all possible. Choose south, east, or west instead.
Should I remove solar lights in winter?
No need to remove quality solar lights in winter. They’re designed for year-round outdoor use. However, performance will be noticeably reduced due to shorter daylight hours and lower sun angles. This is normal and expected. Budget 4-5 hours of light in winter instead of 8-10 in summer. If your lights are positioned well, this winter performance is usually acceptable. Removing lights for storage is only necessary if they’re in particularly harsh exposure or consistently underperforming.
What’s the best direction for solar lights to face?
South is optimal for UK locations. South-facing positions receive consistent sunlight throughout the day and year. South-east or south-west are acceptable alternatives. East-facing works well in summer but provides less winter charging. West-facing is similar. Avoid north-facing placements entirely. If you have a choice of locations, choose the most south-facing option available.
How do I know if my solar light location gets enough sun?
Observe the location throughout a winter day. If it receives at least 4 hours of direct or bright indirect sunlight during daylight hours, it’s probably suitable. Watch for shadows from buildings, trees, or fences that might obscure sun. An easy test: place a solar light there for one full day in winter, then check if it produces reasonable brightness that night. If yes, the location is adequate. If the light is very dim, choose a sunnier spot.
Can shade from trees improve solar light performance?
No. Tree shade reduces charging efficiency significantly. However, deciduous trees (trees that lose leaves in winter) are slightly better than evergreen trees because you get more winter sun when the branches are bare. But even bare winter branches block some sunlight. Generally, avoid placing solar lights beneath trees or in their shadow zones. An open, unshaded location will always outperform a shaded one.
How high should security lights be mounted?
Mount security lights 2-3 metres high to maximise motion sensor coverage and light distribution. At this height, a PIR sensor can detect approaching motion from 5-8 metres away and cover the ground area effectively. Lower mounting reduces detection range and creates harsh shadows. Ensure the solar panel at the top has full sunlight access and isn’t obstructed by roof eaves or overhanging structures.

Summing Up
Solar light placement determines success or failure more than any other factor. Identify south-facing locations receiving 4-6 hours of direct or bright sunlight daily, avoid deep shade and northern exposures, and position lights strategically for coverage and charging. In the UK, this usually means south-facing gardens and properties enjoy consistent, reliable solar lighting performance, whilst north-facing and shaded areas struggle. Spend time surveying your site, understand where the sun actually reaches, and place lights accordingly. The reward is solar lights that work reliably all year, require minimal maintenance, and cost nothing to run.
Updated