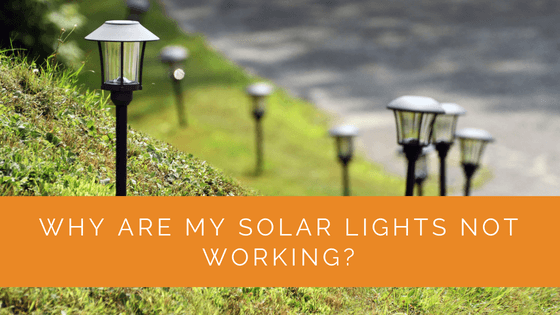
Solar lights are meant to be a set-and-forget way to brighten your garden. But when they suddenly stop working, it’s frustrating. You expect that familiar glow, and nothing happens. The good news is that most solar light problems are straightforward to diagnose and fix without needing to replace the entire unit.
In this guide, we’ll walk you through the most common reasons why solar lights fail to work, how to identify what’s gone wrong, and the practical steps you can take to get them working again. Whether you have stake lights lining your pathway or hanging lanterns in your patio, the troubleshooting process is much the same.
We’ll also cover when it’s worth repairing your lights and when replacement makes more sense financially. By the end, you’ll have a clear action plan for bringing your solar lights back to life.
Contents
- 1 Key Takeaways
- 2 Step-by-Step Solar Light Troubleshooting Guide
- 3 1. Check the On/Off Switch First
- 4 2. Dead or Worn Battery
- 5 3. Dirty or Blocked Solar Panel
- 6 4. Faulty Light Sensor
- 7 5. Water Damage and Corrosion
- 8 6. Broken or Burned-Out LED
- 9 Case Study: A Homeowner in the Midlands Saves Time by Diagnosing Methodically
- 10 Expert Insights From Our Solar Panel Installers About Solar Lights
- 11 Frequently Asked Questions
- 11.1 How long do solar light batteries typically last?
- 11.2 Can I use regular alkaline batteries in solar lights?
- 11.3 Why do my solar lights dim in winter?
- 11.4 How do I know if my solar light sensor is broken?
- 11.5 Is it cheaper to repair or replace a broken solar light?
- 11.6 Can I leave solar lights outside in winter?
- 11.7 How do I prevent water damage to my solar lights?
- 12 Summing Up
Key Takeaways
- Dead or old batteries are the most common reason solar lights stop working. Replace them with quality rechargeable AAs or AAAs suited to UK winter conditions.
- A dirty or obstructed solar panel blocks charging. Clean the panel with a soft cloth and check for leaves, moss, or debris.
- The on/off switch may be stuck in the off position. This is the first thing to check before assuming the light is broken.
- Faulty light sensors can stop the light from triggering at dusk. Test in dim conditions to see if the LED illuminates manually.
- Water damage is common in the UK climate and can corrode internal components. Look for moisture inside the casing or corrosion on battery terminals.
- LED failure is less common but happens in older lights. If the LED doesn’t illuminate when you shade the light, the LED is likely dead.
- Most solar lights last 2-3 years before needing replacement, though LEDs themselves can last 10+ years if protected from water.
Step-by-Step Solar Light Troubleshooting Guide
Work through these steps in order. Most solar light faults are solved within the first three steps, so start simple before assuming something is broken beyond repair.
- Check the on/off switch, Locate the small switch on the underside or side of the unit. Make sure it is set to ON. This sounds trivial, but solar lights ship in the OFF position and can accidentally get knocked to OFF during cleaning or storage. If the switch is already on, toggle it off and back on to reset.
- Clean the solar panel, Take the unit indoors or tilt it so you can see the panel clearly. Use a damp cloth to wipe away any dirt, bird droppings, algae, or grime. In the UK, panels can get coated with a film of pollution and organic matter over weeks of rain. Even a thin layer of dirt can cut charging efficiency by 20-30%. Rinse with clean water and dry before reinstalling.
- Replace the battery, Open the battery compartment (usually a small Phillips screw underneath). Remove the old battery and take note of the type, most solar lights use AA or AAA NiMH rechargeable cells rated at 1.2V, 600-1000mAh. Replace with a fresh NiMH battery of the same specification. Do not use alkaline batteries. After fitting the new battery, leave the light in direct sun for a full day before testing it after dark.
- Test the light sensor, The light sensor (LDR) tells the light when it’s dark enough to switch on. If it’s dirty or stuck, the light may think it’s always daytime. Clean the small sensor lens, it’s usually a clear or amber dome near the panel. To test it: cover the sensor completely with your hand or tape in a dark room. If the LED illuminates, the sensor is working. If not, the sensor may be faulty.
- Check for water ingress, Open the battery compartment and look for signs of moisture, rust on the contacts, or white mineral deposits. If you find any, dry the compartment thoroughly with a lint-free cloth, clean the contacts with fine sandpaper, and apply a thin layer of petroleum jelly to protect them. If the interior is heavily corroded, replacement is likely more cost-effective than repair.
- Inspect the LED, If the battery is charged and the sensor is working but the light still won’t illuminate, the LED itself may have failed. Most modern solar lights use a single high-output LED that lasts 10+ years under normal conditions, but LEDs can fail prematurely due to water damage or voltage surges. Hold the unit with the LED facing a camera phone, a working LED often emits a faint purple glow visible on camera even if it’s not visible to the naked eye. No glow confirms an LED fault.
- Reset the unit, If the light worked previously but now behaves erratically (flashing, staying on all day, failing to charge), try a full reset. Remove the battery and leave the compartment open for 24 hours. This discharges any residual capacitance. Refit the battery, cover the solar panel with black tape for 24 hours to charge without triggering the light, then uncover and allow a full day’s charging before testing.
- Relocate for better sun exposure, Even if all the components are fine, insufficient charging time will prevent the light from working properly after dark. In the UK, solar lights need at least 6 hours of good daylight to charge fully. Move the light to the sunniest spot in your garden, away from overhanging trees, walls, or roof overhangs that cast afternoon shade. South-facing positions are best.
- Check winter performance expectations, In a UK winter, solar lights may only get 2-3 hours of usable daylight. This is not enough to fully charge most units. If your lights are dim or only work for an hour or two after dark between November and February, this is normal behaviour, not a fault. Consider bringing decorative lights indoors during the winter months and reinstalling them from March onwards.
If you have worked through all nine steps and the light still does not work, the unit is likely beyond economic repair. A quality replacement from a reputable brand with a strong IP rating (IP65 or higher) will serve better than repeatedly troubleshooting a cheap unit.
1. Check the On/Off Switch First
Before you do anything else, check the on/off switch on your solar light. It sounds obvious, but more solar light problems start here than anywhere else. Many solar lights have a small sliding switch on the battery compartment or bottom of the unit. It’s easy to accidentally brush it to the off position during installation, maintenance, or even strong wind.
Look for a small switch, usually marked with “On” and “Off” or represented by icons. Slide it firmly to the on position. Some lights use a pull-tab that sits under the battery compartment; if you haven’t removed this yet, do so now. Once the tab is removed, the light should activate at dusk if everything else is working.
Leave the light in bright daylight for at least 30 minutes, then place it in a dark cupboard or cover it with your hand. If the light illuminates when shaded, you’ve found your problem. The switch was simply off. Replace it in its permanent location and test again at dusk.
2. Dead or Worn Battery
This is the number one reason solar lights stop working. The rechargeable batteries inside solar lights only last so long. They typically provide 1 to 2 years of reliable performance before they degrade and can no longer hold a charge effectively.
How to Replace the Battery
Open the battery compartment, usually located on the bottom or side of the light. Carefully remove the old battery, noting which way it was inserted (positive side up or down). Take a photo if you’re uncertain. The battery type is typically AA or AAA, sometimes marked as NiMH or NiCd on the casing.
Purchase a replacement from a UK electronics retailer or supermarket. Look for rechargeable NiMH batteries specifically designed for solar lights. Brands like Panasonic Eneloop and Ansmann are widely available and reliable. Avoid regular alkaline batteries; they won’t recharge properly in the solar panel circuit.
Insert the new battery with the correct polarity, close the compartment, and leave the light in direct sunlight for a full day before expecting it to work at night. The battery needs several charging cycles to reach full capacity.
Checking if the Battery is the Problem
If you have a spare rechargeable battery at home, you can test whether the light itself works. Charge the spare battery fully using a battery charger (not inside the solar light). Install it in the light and cover the solar panel with your hand or place the light in a dark room. If the light immediately illuminates, you’ve confirmed the original battery is dead.
3. Dirty or Blocked Solar Panel
The solar panel on top of the light absorbs sunlight and converts it to energy. Over months, panels accumulate dust, dirt, bird droppings, and moss. In the UK, we also get a lot of cloud cover and rain, which can leave mineral deposits on the panel surface. All of this reduces the amount of light the panel can capture.
How to Clean the Panel
Use a soft, damp cloth to gently wipe the solar panel. Avoid abrasive materials or harsh chemicals; they can scratch the panel and reduce its efficiency further. A microfibre cloth works well. For stubborn deposits, use a little warm water with a tiny drop of washing-up liquid, then rinse thoroughly and dry.
Check also that leaves, branches, or other objects aren’t shadowing the panel during the day. Even partial shade significantly reduces charging. Move the light if necessary or trim back any nearby foliage.
4. Faulty Light Sensor
Solar lights use a light sensor (called a photoresistor or photocell) to detect when it’s dark and trigger the LED to turn on. If this sensor fails or becomes covered in dirt, the light won’t activate at dusk.
Testing the Sensor
In daylight, cover the solar panel entirely with your hand or place the light inside a dark bag. Hold it there for 10 seconds. If the LED illuminates, the sensor is working. If it doesn’t, the sensor is likely faulty.
First, clean the sensor area. It’s usually a small dark component near the top of the light. Use a dry cloth to remove any dirt or condensation covering it. Test again in darkness.
If the light still doesn’t respond, the sensor has failed internally and the light will need to be replaced. Sensors are rarely replaceable in consumer solar lights.
5. Water Damage and Corrosion
The UK climate is wet. Solar lights sitting outside are exposed to rain, morning dew, and condensation. If water seeps into the casing, it corrodes the battery terminals, damages the circuit board, and causes the light to fail gradually or suddenly.
Signs of Water Damage
Open the battery compartment and look inside. Do you see moisture, corrosion (green or white crusty deposits on the terminals), or dark stains? These are all signs of water ingress. If the light has been outside for more than a year without maintenance, water damage is likely.
Repairing Water Damage
If corrosion is minimal, you can try cleaning the battery terminals with a dry cotton bud or fine sandpaper to remove the deposits. Dry everything thoroughly and install a fresh battery. This works in about 30% of cases.
For heavier corrosion or if you see water still inside the casing, the light is unlikely to recover. The internal circuit board is probably damaged. Replacement is the best option.
To prevent future water damage, look for lights with proper seals or gaskets when buying replacements. Store lights indoors during winter if possible, or apply a waterproof sealant to the seams.
6. Broken or Burned-Out LED
The LED (light-emitting diode) inside the solar light can fail over time, especially if it’s been subjected to water, voltage spikes, or simply age. LEDs themselves last 10+ years under ideal conditions, but if water or corrosion reaches the LED, it can fail sooner.
Testing if the LED is Dead
This is tricky to test at home without specialist equipment. However, if you’ve ruled out all other causes (battery is new, sensor works, switch is on, panel is clean) and the light still doesn’t illuminate even in complete darkness, the LED is likely dead.
Some solar lights allow you to replace the LED module, but most do not. Replacement of the entire light is usually the practical solution.
Case Study: A Homeowner in the Midlands Saves Time by Diagnosing Methodically
Background
A homeowner in Birmingham had installed 12 solar lights along her patio edge in spring. By November, only 4 of them still worked reliably. The others were either very dim or completely dark.
Project Overview
Rather than replace all 12 lights, she decided to work through the troubleshooting steps systematically. She identified that half were struggling due to UK winter conditions: shorter days, cloudier skies, and dirty panels.
Implementation
First, she cleaned all the solar panels thoroughly. Several lights brightened immediately. For the ones that stayed dim, she checked the batteries. Four lights had original batteries from spring; after 6 months in the damp patio environment, they had corroded terminals. She replaced these with new NiMH batteries. Finally, she repositioned two lights that had become partially shaded by a growing shrub.
Results
All 12 lights now work again. Only two eventually failed beyond repair (water damage to the circuit board), but she got another 2-3 years of life from the others by catching problems early. The total repair cost was under 20 pounds for replacement batteries and took just 1 hour of effort.
Expert Insights From Our Solar Panel Installers About Solar Lights
We spoke with one of our senior solar installation specialists with over 15 years of experience. Here’s what he shared: “Solar lights are brilliant for UK gardens, but people often don’t realise they need maintenance just like any other outdoor product. The number one mistake I see is expecting solar lights to work year-round with zero care. In the UK winter, you get maybe 8 hours of daylight, and if that daylight is heavily overcast, the panels might only capture 30% of their rated energy. Combined with battery degradation from moisture, you end up with dim or non-working lights by January.
“The fix is simple: treat them like seasonal. In October, check all the batteries and replace any that look corroded. Clean every panel. Remove any trees or structures that have grown up and started shading them. If you do that, you’ll get reliable performance through winter. If you wait until January when they stop working, the repair cost goes up because you’re fighting both age and moisture.
“I also recommend keeping a spare set of rechargeable batteries at home so you can swap one in quickly to test if that’s the problem. It saves a lot of guesswork.”
Frequently Asked Questions
How long do solar light batteries typically last?
Most rechargeable NiMH batteries in solar lights last between 1 and 2 years before showing signs of degradation. In the UK’s damp climate, this can be shorter if water gets inside. You’ll notice them dimming gradually before they stop working entirely. Replacing them annually, especially before winter, keeps your lights working reliably.
Can I use regular alkaline batteries in solar lights?
No, regular alkaline batteries (like those in remote controls) will not work in solar lights. Solar lights require rechargeable NiMH (Nickel-Metal Hydride) batteries or similar rechargeable types. Alkaline batteries cannot be recharged and will be damaged if inserted into a solar light circuit. Always use the correct battery type.
Why do my solar lights dim in winter?
The UK experiences shorter days and cloudier skies in winter, meaning less total sunlight reaches the solar panels. Additionally, older batteries degrade faster in cold and damp conditions. Your lights still work but with less brightness. To improve winter performance, ensure panels are clean, batteries are fresh, and lights are positioned in the sunniest spot available (south-facing exposure). Some people store lights indoors during December and January to extend their lifespan.
How do I know if my solar light sensor is broken?
Cover the solar panel completely (with your hand or a dark bag) for 10 seconds. If the LED illuminates when shaded, the sensor works. If nothing happens, clean the sensor area first, as dirt can block light from reaching it. If cleaning doesn’t help and the light still won’t turn on when shaded, the sensor has failed internally and the light needs replacing.
Is it cheaper to repair or replace a broken solar light?
It depends on the fault. If it’s a dead battery, replacement costs 5-12 pounds and takes 2 minutes. If it’s corrosion or a broken sensor, repair is rarely possible for consumer lights, so replacement (15-50 pounds depending on type) is necessary. Most people replace them after 2-3 years anyway as the total cost is similar to repairing multiple older lights.
Can I leave solar lights outside in winter?
Yes, most solar lights are designed for outdoor use year-round. However, the UK winter is harsh. Damp conditions accelerate corrosion, and reduced daylight means less charging. To keep them working longer, clean the panels regularly, ensure batteries are fresh and not corroded, and position lights in the brightest available spot. Alternatively, store them indoors from December to February and reinstall in spring.
How do I prevent water damage to my solar lights?
Look for lights with quality seals and gaskets around the battery compartment. Check periodically that the seal hasn’t cracked. If you notice water inside, dry it thoroughly and replace the battery. In the UK, consider applying waterproof silicone sealant around the seams before winter. Some people also store lights indoors during the wettest months (November to February) to reduce exposure and extend lifespan.

Summing Up
Solar lights stop working for a handful of predictable reasons. Most of the time, it’s a dead battery, a dirty panel, or a switch accidentally turned off. These problems take minutes to fix and cost very little to solve. Before you bin your lights, work through each troubleshooting step in order. Start with the on/off switch, then check the battery, clean the panel, and test the sensor. Only if none of those work should you consider the light beyond repair.
In the UK, prevention is easier than cure. Set aside an hour each October to service all your solar lights: clean panels, check batteries for corrosion, and replace any that look worn. This simple habit will keep your garden brightly lit all year, even through the grey British winter. If you do need to replace a light, look for the best solar flood lights for reliable outdoor illumination, or check out our guide to how long solar lights last to understand what to expect from your investment. For installation of larger solar systems, contact us for a free quote from our approved installers.
Updated