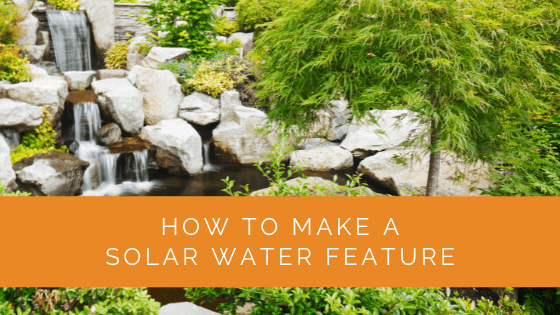
A solar-powered water feature is one of the most satisfying weekend garden projects you can take on. No mains electricity, no running costs, no electrician required, just a pump, a solar panel, and whatever vessel or feature you want to bring to life. The sound of moving water transforms a garden, and doing it entirely off the grid makes it all the more satisfying.
This guide covers everything you need to build a solar water feature in a UK garden: choosing the right pump and panel, planning the project, step-by-step construction using a wooden barrel as the vessel, and how to keep it running well through the British winter.
Contents
- 1 Key Takeaways
- 2 Direct Solar vs Battery-Backed Pumps
- 3 Choosing the Right Pump
- 4 Solar Panel Sizing
- 5 Step-by-Step: Half-Barrel Solar Water Feature
- 6 Maintaining Your Solar Water Feature
- 7 Winterising Your Solar Water Feature
- 8 Troubleshooting
- 9 Expert Insights From Our Solar Panel Installers
- 10 Frequently Asked Questions
- 10.1 Do solar water feature pumps work on cloudy days in the UK?
- 10.2 What is head height and why does it matter?
- 10.3 How long do solar water feature pumps last?
- 10.4 Can solar water features attract wildlife?
- 10.5 Do I need planning permission for a solar water feature?
- 10.6 How do I stop algae growing in my solar water feature?
- 10.7 How much does a solar water feature cost to build?
- 10.8 Can I leave a solar water feature running all year?
- 11 Summing Up
Key Takeaways
- Solar water feature pumps come in two types: direct solar (runs only in sunlight) and battery-backed (stores charge and runs day and night).
- Match pump flow rate to your water volume and desired effect, a gentle bubble needs 200–500 litres per hour; a taller fountain jet needs 800–1,500 l/hr or more.
- Head height (the vertical distance the pump must push water) dramatically affects flow rate, always check the pump’s head curve, not just its maximum flow rate.
- In UK winters, remove submersible pumps when temperatures consistently drop below freezing to prevent frost damage.
- A half-barrel planter is one of the easiest vessels to start with, watertight, attractive, and widely available at UK garden centres.
Direct Solar vs Battery-Backed Pumps
The first decision is whether you want a pump that runs only when the sun shines, or one that stores charge and runs continuously. Both have genuine advantages depending on your priorities.
Direct solar pumps are simpler and cheaper. The panel connects directly to the pump, and the pump runs when there’s enough light, which in UK conditions means a few hours either side of noon on sunny days, with weaker output on overcast days. They stop at night and on heavily overcast days. For a purely ornamental fountain where the sound and movement is a daytime pleasure, this is often perfectly adequate.
Battery-backed systems include a small rechargeable battery that stores solar energy during the day and releases it gradually, allowing the pump to run for several hours after dark and through shorter periods of cloud cover. They cost more and the battery adds an element requiring eventual replacement (typically 3 to 5 years), but they deliver a more consistent, reliable effect.
For a wildlife pond or feature intended to support aquatic life, a battery-backed pump with overnight operation is better, circulation and oxygenation are most valuable when natural photosynthesis stops at night.
Choosing the Right Pump
Pump performance is described by two key figures: maximum flow rate (litres per hour at zero head) and maximum head height (the vertical distance it can push water at zero flow). Real-world performance is somewhere between these extremes, always look at the pump’s flow-head curve if available.
For a gentle bubbling effect in a barrel or pot, 200 to 500 l/hr at your actual head height is sufficient. For a visible fountain jet that rises 30 to 50cm above the water surface, you need closer to 800 to 1,500 l/hr at the relevant head. For a cascade or millstone feature where water needs to travel horizontally as well as vertically, head height requirements increase further.
For UK conditions, it’s worth choosing a pump rated for your desired effect at approximately double the head height you think you need, overestimating panel performance in British weather is the most common beginner mistake, and a slightly overpowered pump running at partial capacity is quieter and gentler than an underpowered pump straining at its limits.
Solar Panel Sizing
Pump manufacturers typically specify which panel wattage their pumps require. A basic fountain pump might need only 3 to 5W; a more capable pump might need 10 to 20W. For battery-backed systems, the panel needs to not only power the pump during the day but also charge the battery, typically requiring 10 to 30W.
In UK conditions, plan for your panel to deliver its rated output for perhaps 3 to 5 hours on a good summer day, and perhaps 1 to 2 effective hours on an overcast day. A 10W panel delivers roughly 30 to 50Wh on a reasonable day, enough to run a modest battery-backed pump through evening and night with comfortable margin. Positioning the panel to face south at approximately 35 degrees from horizontal maximises annual energy capture.
Step-by-Step: Half-Barrel Solar Water Feature
What You’ll Need
- A half-barrel planter (oak or pine, widely available at UK garden centres for £30–£60)
- Pond liner or waterproof sealant suitable for wood
- Solar-powered fountain pump kit (panel + pump + cable)
- Decorative stones or pebbles
- Optional: aquatic plants in mesh baskets
Step 1, Prepare the Barrel
New half-barrels often have gaps between the staves that need to swell shut. Fill the barrel with water and leave it for 24 to 48 hours, the wood will swell and become watertight. If gaps persist after soaking, apply a waterproof sealant to the inside (Barrettine Timber Sealer or a similar pond-safe product). Never use bitumen paint or toxic sealants, they’ll harm any wildlife that visits.
Step 2, Position the Barrel
Choose a location that receives good direct sun for at least 4 hours during the middle of the day. Avoid siting directly under trees, leaf fall will pollute the water and shade the panel. Position the barrel where you want it permanently before filling, as a full 100-litre barrel weighs around 100kg and is immovable.
Step 3, Install the Pump
Place the pump on the bottom of the barrel. If the pump comes with a spray head or fountain nozzle, attach it now. Route the cable over the rim, most kits include enough cable for the panel to be positioned 2 to 3 metres away. Add a layer of decorative pebbles around the pump to weigh down the cable and improve the appearance of the base.
Step 4, Position the Solar Panel
Mount or position the panel facing south at an angle of 30 to 45 degrees. Most pump kits include a small frame or spike for ground mounting. If the panel is in a fixed position, ensure no shadows fall on it during midday, even a small shadow from a fence post can significantly reduce output.
Step 5, Fill and Test
Fill the barrel with tap water to within 5cm of the rim. Connect the panel in direct sunlight, the pump should start within seconds if the light is sufficient. Adjust the nozzle height and spray pattern to your preference. Add aquatic plants if desired: water lettuce, dwarf water lily, or water mint work well in barrels and help keep the water clear by competing with algae for nutrients.
Maintaining Your Solar Water Feature
Top up the water level regularly in summer, evaporation plus transpiration from plants can reduce water level noticeably during warm, sunny periods. A drop in water level can expose the pump impeller, causing it to run dry and overheat.
Clean the pump filter every 4 to 6 weeks. Most submersible pumps have a removable foam filter around the impeller housing, rinse this under clean water to remove debris. A clogged filter significantly reduces flow rate and puts strain on the motor.
Clean the solar panel surface if it accumulates dust, bird droppings, or fallen leaves. A damp cloth is all that’s needed. Dirty panels can lose 10 to 20% of their output.
Winterising Your Solar Water Feature
In UK winters, the risk isn’t primarily from the water freezing in the barrel, a partially frozen barrel is harmless to the feature itself. The risk is to the pump. If the impeller housing freezes around the pump mechanism, it can crack the housing when thawing or cause the motor to burn out when it tries to restart.
The simplest winterising approach is to remove the pump when night temperatures consistently drop to freezing or below (typically November to March in most of the UK). Store the pump in a frost-free location, a garage or shed is fine. You can leave the barrel filled with water; it acts as a wildlife drinking source through winter even without the pump running.
Reconnect the pump in March or April when the risk of sustained frost has passed. Before reconnecting, inspect the pump impeller and cable for any damage, and clean the filter before restarting.
Troubleshooting
If the pump stops running or runs weakly, check in this order: panel position (is it in shade?), cable connections (are they secure?), pump filter (is it clogged?), water level (is the pump submerged?), and battery charge status (if battery-backed). Most issues are simple and resolvable without specialist tools.
If the pump runs but flow is weak, the most common causes are a clogged filter or a head height that exceeds the pump’s capability at the available solar power level. On an overcast day, a pump that works beautifully in full sun may barely trickle, this is normal behaviour for direct solar pumps.

Expert Insights From Our Solar Panel Installers
One of our senior solar panel installers with over 14 years of experience in garden solar projects commented: “The most common mistake people make is buying a pump rated for the maximum flow rate without checking the head height. I’ve seen setups where the pump is technically powerful enough but because it’s pushing water up a metre-high millstone feature, the actual flow rate at that head height is a fraction of what was expected. Always look at the head curve, not just the maximum flow figure. And for UK use, buy a size up from what you think you need, our weather means you’ll often be running at partial panel output.”
Frequently Asked Questions
Do solar water feature pumps work on cloudy days in the UK?
Direct solar pumps run at reduced output on cloudy days, expect 20 to 40% of their sunny-day flow rate on a typical overcast UK day. Battery-backed pumps store charge and can run more consistently through cloud cover, making them better suited to the UK climate for a reliable effect. On heavily overcast winter days, even battery-backed systems may struggle to recharge fully.
What is head height and why does it matter?
Head height is the vertical distance the pump must push water against gravity. A pump’s rated maximum flow rate applies at zero head (pumping on a flat surface). For every metre of vertical rise, flow rate reduces significantly. If your fountain jet is 50cm above the water surface, choose a pump whose head curve shows adequate flow at 0.5m of head, not just at its maximum flow rate figure.
How long do solar water feature pumps last?
A well-maintained submersible solar pump typically lasts 3 to 5 years. The motor and impeller are the components most likely to fail, usually due to debris ingestion or running dry. Regular filter cleaning, winterising the pump before frosts, and keeping the water level topped up significantly extends pump life.
Can solar water features attract wildlife?
Yes, moving water is particularly attractive to birds for drinking and bathing. A barrel water feature will often attract blackbirds, robins, and sparrows within days of installation. If you want to encourage wildlife, avoid fish (which eat invertebrates) and add aquatic plants to improve habitat value. Leave a small ramp or slope for hedgehogs and other mammals to climb out safely if they fall in.
Do I need planning permission for a solar water feature?
No. A garden water feature with a small solar panel is a domestic garden accessory and does not require planning permission in the UK. Even in conservation areas, a standalone garden feature of this type falls well within permitted development rights. Listed buildings have stricter rules, but a portable barrel feature that doesn’t affect the structure is unlikely to require consent even then.
How do I stop algae growing in my solar water feature?
Moving water inhibits algae growth, so the pump itself helps. Aquatic plants compete with algae for nutrients, water lettuce, water hyacinth, or oxygenating plants like hornwort are effective. Position the feature in partial shade rather than full sun where possible. Barley straw coils or barley straw extract sachets, available at garden centres, are a natural and pond-safe algae inhibitor widely used in the UK.
How much does a solar water feature cost to build?
A basic direct solar fountain pump kit costs £15 to £40. A battery-backed kit with a decent panel costs £40 to £100. A half-barrel planter costs £30 to £60 at UK garden centres. Decorative pebbles and aquatic plants add £10 to £30. Total DIY cost for a complete barrel solar water feature is typically £80 to £200 depending on pump quality and decorative choices.
Can I leave a solar water feature running all year?
You can leave the barrel running year-round in mild parts of the UK, but the pump should be removed and stored when sustained frost is forecast. A frozen pump can crack or burn out when restarted. In practice, removing the pump from November to March and reinstating it in spring is the most reliable approach for most UK gardens.

Summing Up
Building a solar water feature is a weekend project that delivers real, lasting pleasure for minimal running cost. The key decisions are choosing between direct solar and battery-backed operation, matching pump capacity to your head height requirements, and winterising the pump properly each autumn. A half-barrel with a quality battery-backed solar pump is a great starting point, it’s forgiving to build, looks attractive in almost any garden style, and will reward you with the sound of moving water from spring through autumn with virtually no ongoing effort or expense.
Updated