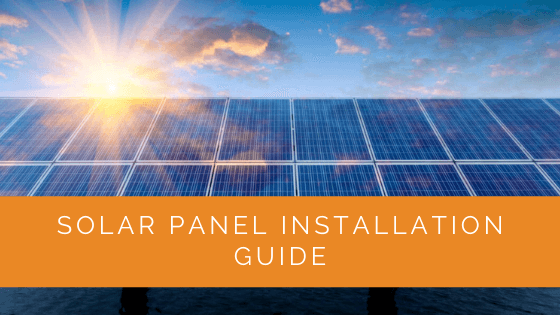
Getting solar panels installed on your home is one of the most impactful decisions you can make to reduce your energy bills and your carbon footprint. But what does the actual installation process look like? Whether you’re considering solar for the first time or you’ve already decided to go ahead, understanding what happens from survey to switching on will help you make an informed choice and know what to expect on installation day.
Professional solar panel installation in the UK is a straightforward, well-regulated process. An MCS-certified installer will handle everything from your initial roof survey through to grid connection and Smart Export Guarantee (SEG) registration. For most homes, the physical installation takes just 1–2 days, though the full process from getting a quote to generating income from your solar panels typically spans 2–3 months. With 0% VAT on solar installations available until March 2027, now is an excellent time to get quotes and understand what a system will actually cost you.
A typical UK home installing a 4kWp solar system can expect to generate around 3,400 kWh of electricity per year, saving £500–1,000+ annually on energy bills before even accounting for Smart Export Guarantee (SEG) payments. Let’s walk through the entire installation journey so you know exactly what to expect.
Contents
- 1 Key Takeaways
- 2 How the Solar Panel Installation Process Works
- 2.1 Stage 1: Initial Site Survey and Assessment
- 2.2 Stage 2: Quotation and System Design
- 2.3 Stage 3: Contract and Ordering
- 2.4 Stage 4: Scaffolding Erection (1 Day)
- 2.5 Stage 5: Installation Day (1–2 Days)
- 2.6 Stage 6: DNO Notification and Grid Connection Approval
- 2.7 Stage 7: MCS Certificate and Documentation
- 2.8 Stage 8: Smart Export Guarantee (SEG) Registration
- 3 How Long Does Solar Panel Installation Take?
- 4 Do I Need Planning Permission for Solar Panel Installation?
- 5 What Does Solar Panel Installation Cost in the UK?
- 6 What to Look for in a Solar Panel Installer
- 7 What Happens After Installation?
- 8 Solar Panel Installation Grants and Incentives
- 9 Case Study: Solar Panel Installation in Hertfordshire
- 10 Expert Insights From Our Solar Panel Installers
- 11 Frequently Asked Questions
- 11.1 How long does solar panel installation take?
- 11.2 Do I need planning permission to install solar panels in the UK?
- 11.3 Can I install solar panels myself?
- 11.4 How much does solar panel installation cost in the UK?
- 11.5 What is an MCS certificate and why do I need one?
- 11.6 What happens after my solar panels are installed?
- 11.7 Do solar panel installers handle DNO notifications?
- 11.8 How do I choose a reliable solar panel installer in the UK?
- 12 Summing Up
Key Takeaways
- Solar panel installation takes 1–2 days on site for a typical domestic system, with total project duration from quote to grid connection spanning 2–3 months
- Typical installation costs range from £5,000 to £12,500 depending on system size, with 0% VAT available until March 2027
- MCS certification is non-negotiable for warranty coverage, performance guarantees, and SEG eligibility
- Most UK homes fall under permitted development and do not need planning permission for roof-mounted solar panels
- Installers handle all DNO notifications: G98 for systems under 3.68kW (same-day notification) and G99 for larger systems (20–40 working days approval)
- The installation process includes roof survey, structural assessment, panel mounting, wiring, inverter installation, testing, and commissioning
- After installation, you’ll receive an MCS certificate, can register for Smart Export Guarantee payments, and should expect annual maintenance checks
How the Solar Panel Installation Process Works
The journey to having working solar panels involves several distinct stages. Understanding each one means you’ll know what to expect and can plan accordingly.
Stage 1: Initial Site Survey and Assessment
Your MCS-certified installer will visit your home to conduct a detailed roof survey. They’ll assess your roof orientation (ideally south-facing in the UK), roof pitch (typically 30–40 degrees is optimal), the structural integrity of your roof, any shading from trees or buildings, and the condition of your tiles or roofing materials. They’ll also check your electrical setup, including where the inverter will be mounted (usually in a garage, loft, or outdoor wall) and how the AC wiring will run to your consumer unit.
This survey is critical. It determines how many panels your roof can safely accommodate, which inverter type suits your setup (string inverter, microinverters, or power optimisers), and whether any additional work is needed—such as reinforced roof struts or new cabling. A good installer will also discuss shading mitigation options like SolarEdge optimisers or Enphase microinverters if partial shading is an issue.
Stage 2: Quotation and System Design
Based on the survey, your installer creates a detailed design and quotation. This includes the specific panel model, inverter type, mounting system, cabling, and labour costs. You’ll receive a breakdown of costs before and after the 0% VAT allowance (saving around £250–600 on a typical system). The quote should also clarify what’s included: scaffolding, DNO notification, MCS application, and optional battery storage.
Always get 3–5 quotes from different installers before deciding. This helps you spot outliers (very cheap quotes often indicate poor quality or missing elements, whilst very expensive quotes may overcharge for labour).
Stage 3: Contract and Ordering
Once you’ve chosen your installer and signed the contract, they’ll place the order for panels, inverter, and mounting equipment. Lead times vary but typically range from 2–4 weeks, depending on stock availability and the time of year. Your installer should provide a fixed completion date at this stage.
Stage 4: Scaffolding Erection (1 Day)
A few days before the installation date, scaffolding contractors will erect working platforms around your roof. This typically takes a full day and ensures the installation team can work safely at height. Scaffolding is usually left in place for several days after installation to allow for final checks and removal of the system.
Stage 5: Installation Day (1–2 Days)
This is the main event. On installation day, your team will arrive early morning with all the equipment they need. Here’s what happens:
- Roof work: Rails and mounting brackets are bolted to your roof structure using roof hooks (for slate or tile roofs) or direct clamps (for modern tiles). The installation team does NOT penetrate the roof membranes—everything is mechanically fastened.
- Panel installation: Individual panels are lifted onto the rails and wired together in strings (series connection for string inverters) or individually (for microinverters).
- DC cabling: Cables run from the panels down the side of your house (usually through external conduit) to the DC isolator switch near the inverter.
- Inverter installation: The inverter is mounted indoors (typically in a garage, utility room, or loft) or outdoors on a wall. It converts DC electricity from the panels to AC electricity for your home.
- AC wiring: AC cables connect the inverter to your consumer unit (fuse box), passing through a dedicated 32-amp breaker. Your installer will ensure all work complies with BS 7909 electrical standards.
- Testing and commissioning: Before anything is switched on, the installer tests all circuits, voltage, grounding, and RCD (residual current device) protection. Only once everything tests safe is the system energised.
A typical 4–5 kWp system can be fully installed in 1 day; larger or more complex systems may take 2 days. Your installer will also install a generation meter (provided by the DNO on G99 systems) to measure how much electricity your panels produce.
Stage 6: DNO Notification and Grid Connection Approval
Your installer is responsible for notifying your local DNO (Distribution Network Operator—typically your regional electricity company). There are two notification routes:
- G98 (Standard Notification): For systems up to 3.68 kW. The DNO is notified and has 30 days to object (rarely happens). In practice, your system can usually be switched on immediately after notification.
- G99 (Full Application): For systems over 3.68 kW. The DNO reviews the design, requests any modifications, and takes 20–40 working days to grant approval. You cannot switch on your system until G99 is approved.
Your installer typically handles this paperwork and liaisons with the DNO. Once approval is granted (or notification is made), you’re cleared to use your solar panels for real.
Stage 7: MCS Certificate and Documentation
Your installer applies for the Microgeneration Certification Scheme (MCS) certificate on your behalf. This certificate confirms the system is installed to MCS standards and qualifies you for the 25-year performance guarantee (your panels will produce at least 80% of their rated output after 25 years). The MCS certificate is essential for Smart Export Guarantee registration.
Typically issued within 2–3 weeks of installation, your MCS certificate will include details of your system, the installer, and performance estimates. You’ll receive the original and should keep it safely.
Stage 8: Smart Export Guarantee (SEG) Registration
Once your MCS certificate is issued, you can register with a SEG provider (Octopus Energy, OVO Energy, British Gas, etc.) to receive payments for electricity your panels export back to the grid. Registration usually takes 1–2 weeks, and payments typically begin the following month. SEG rates vary by supplier—currently ranging from 10p to 15p per kWh—so it’s worth shopping around.
How Long Does Solar Panel Installation Take?
The timeline from initial contact to your first SEG payment spans several months. Here’s a realistic breakdown:
| Stage | Typical Timeframe |
|---|---|
| Getting and comparing quotes | 1–2 weeks |
| Signing contract and ordering equipment | 2–4 weeks |
| Scaffolding erection | 1 day |
| Installation (physical work on roof and indoors) | 1–2 days |
| DNO G98 notification (systems under 3.68 kW) | Same day (installer submits) |
| DNO G99 approval (systems over 3.68 kW) | 20–40 working days |
| MCS certificate issued | 2–3 weeks after installation |
| SEG registration and first payment | 1–2 weeks after MCS certificate |
| Scaffolding removal | 1 day (typically 1 week after installation) |
Total time from first contact to receiving your first SEG payment: approximately 3–4 months for a G98 system (under 3.68 kW) or 4–5 months for a G99 system (larger than 3.68 kW).
Do I Need Planning Permission for Solar Panel Installation?
The good news is that most residential solar panel installations in the UK fall under permitted development and don’t require planning permission. This is one of the fastest routes to getting solar installed.
When You DON’T Need Planning Permission (Permitted Development)
For pitched roofs, panels are permitted development if:
- Your home is a house (not a flat or apartment)
- Panels are installed on a south, south-east, or south-west facing roof slope
- Panels do not protrude more than 200mm above the roof line at any point
- Your home is not in a conservation area or an Area of Outstanding Natural Beauty
For flat roofs, panels are permitted development if:
- Panels do not exceed 1.5m in height above the roof surface
- Your home is not in a conservation area
- Panels are not visible from the front of your property (i.e. from a public road)
When You DO Need Planning Permission
Planning permission is required in these situations:
- Your home is in a conservation area (rear-roof installations usually okay, front-facing ones may need approval)
- Your property is listed or a listed building
- Panels are visible from a public road and you’re in a particularly sensitive area (national parks, Areas of Outstanding Natural Beauty)
- Panels extend more than the permitted height/protrusion limits
If you’re unsure whether your property needs permission, your installer will advise. You can also check the Planning Portal website, which has detailed guidance on permitted development rights in your area.
What Does Solar Panel Installation Cost in the UK?
Installation costs depend primarily on system size. Labour, scaffolding, and electrical work dominate the cost, whilst the panels themselves have become increasingly affordable. Here’s a realistic breakdown for typical UK home installations:
| System Size | Number of Panels | Typical Cost (Including VAT) | Annual Output (South-Facing Roof) |
|---|---|---|---|
| 3 kWp | 6–8 panels | £5,000–£6,500 | ~2,500 kWh |
| 4 kWp | 9–10 panels | £6,500–£8,500 | ~3,400 kWh |
| 5 kWp | 11–13 panels | £8,000–£10,500 | ~4,250 kWh |
| 6 kWp | 13–15 panels | £9,500–£12,500 | ~5,100 kWh |
0% VAT saving: Until March 2027, solar installations benefit from 0% VAT (down from 5%). This saves £250–600 on a typical system. Always confirm with your installer that they’re applying this relief to your quote.
Battery storage: Adding a battery (e.g. 10 kWh LiFePO4) costs £4,500–7,000. Batteries are not eligible for the 0% VAT relief but do increase self-consumption and SEG revenue (you can store daytime solar for evening use).
For a detailed cost analysis by region and system size, see our full solar panel installation cost guide.
What to Look for in a Solar Panel Installer
Not all installers are created equal. Choosing the right one protects your investment and ensures you get genuine 25-year warranties and SEG eligibility. Here’s what to look for:
MCS Certification (Non-Negotiable)
Always use an MCS-certified installer. MCS (Microgeneration Certification Scheme) certification means the installer:
- Has been independently audited and meets strict technical and customer service standards
- Can issue the MCS certificate that qualifies you for the 25-year performance guarantee
- Provides a 10-year warranty on workmanship (as a minimum)
- Is covered by consumer protection and dispute resolution schemes
Without MCS certification, you won’t qualify for SEG payments and your warranty protection is limited. Check for MCS-approved installers at the MCS registry on their website.
RECC Registration
RECC (Renewable Energy Consumer Code) registration provides additional consumer protection. RECC-registered installers are bound by a code of conduct and have dispute resolution processes in place if anything goes wrong.
Get Multiple Quotes
Always get at least 3 quotes from different installers. Compare the following:
- Panel brand and wattage (Tier 1 brands like LONGi, Jinko, or Trina are safest)
- Inverter type and brand (SolarEdge, Fronius, Enphase are market leaders)
- Installation labour and scaffolding costs (should be itemised)
- Warranty terms—look for 10-year workmanship, 25-year product, and 25-year performance guarantees
- Whether DNO notification and MCS application are included
- Post-installation support and monitoring options
Check Reviews and Case Studies
Ask installers for references or case studies from recent work. Look for reviews on independent platforms like Trustpilot or Which?. Be wary of installers with consistently negative reviews or no online presence.
Warranties Explained
A complete solar installation should come with three warranties:
- Workmanship warranty: 10 years (covers labour and installation defects)
- Product warranty: 25 years (covers panels and inverter against manufacturing defects)
- Performance warranty: 25 years (covers degradation—MCS-certified systems guarantee at least 80% output after 25 years)
What Happens After Installation?
Once your system is switched on and generating electricity, your journey doesn’t stop. Here’s what to expect in the weeks and months ahead.
Monitoring Your System
Most modern systems come with a monitoring app. You’ll be able to see real-time generation, daily and monthly output, and system performance. If generation drops unexpectedly, monitoring alerts can flag issues early.
Your First SEG Payment
After registering with a SEG provider, you’ll receive monthly or quarterly payments for exported electricity. Current rates range from 10p to 15p per kWh depending on the supplier. The exact amount depends on how much surplus electricity your system exports (after you’ve used electricity in your home).
Annual Maintenance Checks
Your installer should offer an annual maintenance visit to check connections, test performance, and clean panels if needed. Solar panels self-clean during rain in most UK climates, but a professional clean every 3–5 years can boost output by 3–8%, especially if you live near a motorway or have trees overhead.
Degradation and Performance
Expect your system to degrade by about 0.3–0.5% per year. This is completely normal. After 25 years, a good-quality panel will still produce around 80–85% of its original output. This is why the MCS performance guarantee is so valuable—it protects you against unexpectedly rapid degradation.
Solar Panel Installation Grants and Incentives
Several financial incentives can reduce your installation costs or increase your returns:
- 0% VAT (until March 2027): Saves £250–600 on a typical system. Confirm your installer is applying this relief.
- Smart Export Guarantee (SEG): Octopus Energy (15p/kWh), OVO Energy (12p/kWh), and other suppliers pay you for electricity you export to the grid. At 4 kWp, this could earn you £150–300 per year.
- Boiler Upgrade Scheme (BUS): If combining solar with an air-source heat pump, you can claim a £7,500 grant on the heat pump (solar isn’t eligible for BUS, but heat pumps paired with solar are highly efficient).
- ECO4 scheme: For low-income households, ECO4 may cover installation costs. Ask your installer if you qualify.
- Warm Homes Local Grant: Some local authorities offer solar installation grants to eligible homeowners.
For a complete guide to current grants and schemes, see solar panel grants in the UK.
Case Study: Solar Panel Installation in Hertfordshire
A family in Hertfordshire with a south-facing semi-detached house decided to install a 4 kWp solar system after receiving multiple quotes. Here’s how their project unfolded:
Background
The homeowners were paying around £1,400 per year for electricity and wanted to reduce their energy costs and environmental impact. Their roof was in good condition, south-facing, and had no shading issues.
Project Overview
System size: 4 kWp (10 panels) with a 5 kWp string inverter. Total cost after 0% VAT relief: £7,200. No battery storage was installed initially, though they left room for future expansion.
Implementation
Scaffolding was erected on a Monday, installation took place on Tuesday and Wednesday, and scaffolding was removed the following week. The entire project from site survey to MCS certificate took 3 months. G98 notification was handled by the installer and confirmed the same day.
Results
The system generates approximately 3,400 kWh per year. At an average of £0.20 per kWh, this saves the family around £680 per year on electricity bills. Smart Export Guarantee payments add another £150 per year (exporting 1,000 kWh at 15p/kWh). Combined annual savings total £830, bringing the payback period to approximately 8.7 years. Over 25 years, the system will save the family over £20,000.
Expert Insights From Our Solar Panel Installers
One of our senior solar panel installers with over 15 years of installation experience explains what matters most:
“Getting multiple quotes is absolutely critical. I regularly see homeowners comparing just two or three quotes and missing better options. We always recommend at least five quotes from different installers—you’d be surprised at the variation in price and specification for identical systems. MCS certification is non-negotiable; it’s what separates genuine installers from cowboys. And don’t be tempted by the cheapest quote. Often, the cheapest installers cut corners on mounting quality, electrical testing, or post-installation support. A professional site survey should take at least 30 minutes; if an installer is in and out in 10 minutes, they haven’t done their job properly and you won’t get accurate performance estimates.”
“One thing homeowners often underestimate is the importance of the DNO notification process. For G98 systems, it’s straightforward. But for larger G99 systems, don’t be surprised if it takes 4–6 weeks. Plan your project timeline accordingly. And finally, register your system for SEG as soon as your MCS certificate arrives—don’t leave money on the table by delaying.”
Frequently Asked Questions
How long does solar panel installation take?
The physical installation typically takes 1–2 days on your roof and indoors. However, the complete project from getting quotes to receiving your first SEG payment spans 3–4 months (for systems under 3.68 kW) or 4–5 months (for larger systems requiring G99 DNO approval).
Do I need planning permission to install solar panels in the UK?
Most residential solar installations fall under permitted development and don’t require planning permission. Exceptions include properties in conservation areas, listed buildings, national parks, or homes in certain sensitive areas. Your installer will advise whether permission is needed.
Can I install solar panels myself?
You can design and plan your own system, but installation must be carried out by a certified electrician who’s Part P registered (for electrical work compliance) and ideally MCS-certified (for warranties and SEG eligibility). DIY installation voids warranties and disqualifies you from SEG payments.
How much does solar panel installation cost in the UK?
Costs range from £5,000–£12,500 depending on system size. A typical 4 kWp system costs £6,500–£8,500. The 0% VAT relief available until March 2027 saves £250–600. Always get multiple quotes to compare.
What is an MCS certificate and why do I need one?
The MCS (Microgeneration Certification Scheme) certificate confirms your system meets quality standards and is installed by a certified professional. You need it to qualify for the 25-year performance guarantee, to register for Smart Export Guarantee payments, and to receive proper warranty coverage.
What happens after my solar panels are installed?
After installation and DNO approval, you’ll receive an MCS certificate (2–3 weeks), register for Smart Export Guarantee payments (1–2 weeks), and start generating your own electricity. Your installer should provide monitoring access and annual maintenance checks.
Do solar panel installers handle DNO notifications?
Yes. Your installer is responsible for notifying the DNO (Distribution Network Operator). For systems under 3.68 kW (G98), this is same-day notification. For larger systems (G99), approval takes 20–40 working days. You cannot switch on your system until notification is submitted or approval is granted.
How do I choose a reliable solar panel installer in the UK?
Look for MCS certification, RECC registration, at least 10 years’ experience, references or case studies, and clear warranty terms (10-year workmanship, 25-year product, 25-year performance). Always get 3–5 quotes and check independent reviews on Trustpilot or Which?.
Summing Up
Solar panel installation in the UK is a well-regulated, professionally managed process. From initial survey through to grid connection, every stage is designed to ensure safety, quality, and long-term performance. By choosing an MCS-certified installer, getting multiple quotes, and understanding the timeline and costs involved, you’ll be well-prepared for the transition to solar energy.
The financial case is compelling. A typical 4 kWp system costing £7,200–£8,500 will save you £500–1,000+ per year and pay for itself in 8–10 years. Over 25 years, you’re looking at savings exceeding £20,000. Factor in the environmental benefit of generating your own clean electricity, and solar installation becomes one of the most worthwhile home improvements you can make. If you’re ready to explore what solar could save you, contact us for a free installation quote and speak with one of our MCS-certified installers today.
Updated