Solar panels are designed to withstand decades of exposure to the elements, with most systems lasting 25 to 30 years with minimal degradation. However, they are not indestructible. Hail storms, high winds, accidental impact, manufacturing defects, and poor installation can all cause damage requiring professional repair. Knowing what can go wrong, how to spot problems early, and when to call a professional can save you significant money and keep your system generating reliable income.
If your solar panels have suffered damage or you suspect a fault, getting them professionally assessed and repaired is essential to maintaining optimal performance and protecting your investment. Our network of MCS-certified solar panel repair specialists can diagnose and fix issues quickly.
Contents
- 1 Key Takeaways
- 2 Common Solar Panel Damage and Failures
- 3 Identifying Solar Panel Damage: Visual Inspections and Monitoring
- 4 What Homeowners Can and Cannot Do
- 5 Repair Costs and When Repair Versus Replacement Makes Sense
- 6 Identifying Faulty Panels: Thermal Imaging and Electrical Testing
- 7 Bird Damage and Prevention
- 8 Insurance Claims for Storm Damage
- 9 Case Study: Storm Damage and Insurance Recovery in Greater Manchester
- 10 Expert Insights From Our Solar Panel Installers About Repair and Maintenance
- 11 Finding an MCS-Certified Repair Specialist
- 12 Frequently Asked Questions
- 12.1 Can a cracked solar panel still generate electricity?
- 12.2 How long do solar inverters last?
- 12.3 What is a hotspot in solar panels?
- 12.4 Can I repair solar panels myself?
- 12.5 How much does panel replacement cost in the UK?
- 12.6 Does home insurance cover solar panel damage?
- 12.7 What is thermal imaging of solar panels?
- 12.8 How can I prevent bird damage to my solar panels?
- 13 Summing Up
Key Takeaways
- Common solar panel damage includes cracked glass, delamination, hotspots, loose connections, and inverter failure
- Micro-cracks can develop from manufacturing defects or thermal stress and gradually reduce panel output
- Bird damage, particularly roof-mounted installation access, is preventable with proper screening
- Inverter failures typically cost £1,000 to £2,000 to replace, with string inverters cheaper than hybrid systems
- Panel replacement costs £200 to £400 per unit depending on wattage and technology
- Thermal imaging can identify hotspots and faulty panels without dismantling your system
- Insurance claims for storm damage are usually successful if panels are properly documented
- Professional MCS-certified installers must conduct repairs to maintain warranties and grid compliance
Common Solar Panel Damage and Failures
Solar panels can experience several distinct types of damage, each with different causes and repair requirements.
Cracked glass is the most visible form of damage. Hail stones larger than 20 millimetres, roof debris from high winds, or impact from falling objects can fracture the glass surface. A single crack may not immediately destroy panel functionality, as individual cells can continue operating around the damaged area. However, cracked panels have compromised weather protection and will eventually allow moisture ingress, leading to faster degradation.
Delamination occurs when the layers of material bonding the solar cells to the glass backing separate, typically due to manufacturing defects, poor installation, or extreme temperature fluctuations. You’ll notice delamination as cloudiness, discolouration, or visible separation appearing within the panel. Delaminated panels lose structural integrity and perform increasingly poorly as moisture penetrates internally.
Hotspots are localised areas where a panel generates significantly more heat than surrounding regions. These can result from micro-cracks in individual cells, poor solder connections, or manufacturing defects. Hotspots reduce overall output and can damage other components if left unaddressed. Thermal imaging reveals hotspots clearly, showing temperature variations across the panel surface.
Micro-cracks are hairline fractures invisible to the naked eye that develop from thermal stress or manufacturing defects. A panel subjected to daily temperature swings (hot days reaching 70 to 80 degrees Celsius on the surface, cold nights dropping to near freezing) may develop micro-cracks over months or years. Individually small, but collectively significant across multiple cells, micro-cracks reduce output by 5 to 15 percent and tend to worsen progressively.
Inverter failures represent a different but equally serious problem. Inverters convert DC electricity from the panels to AC electricity for your home or grid export. They typically last 10 to 15 years (shorter than panels at 25 to 30 years), meaning most systems require inverter replacement during their operational lifetime. Inverters fail due to component degradation, voltage spikes during storms, or manufacturing defects.
Loose connections or corroded wiring reduce system efficiency and create safety hazards. Thermal expansion and contraction can loosen terminal connections over time, whilst corrosion occurs in damp coastal locations or where moisture has infiltrated conduit.
Identifying Solar Panel Damage: Visual Inspections and Monitoring
Regular monitoring is the best way to catch problems early. Most modern solar systems include monitoring software accessible via smartphone app or web portal. This shows your system’s daily output in kilowatt-hours. A sudden drop in generation without obvious cause (cloudy weather, shade) signals a potential problem.
Monthly output trends matter more than single-day readings. If your system generates 20 percent less electricity than expected for the season, something is wrong. Compare your actual output to predicted values from the installer or monitoring system’s performance estimate.
Visual inspection from ground level can identify obvious issues. Look for cracked glass, visible damage to frames, or panels that appear misaligned. However, you should never climb onto your roof to inspect panels closely unless you’re experienced in roof safety. Installers use specialised equipment and safety harnesses.
Thermal imaging (infrared thermography) is the gold standard for detailed fault diagnosis. A thermal camera shows temperature distribution across your entire array, instantly revealing hotspots indicating micro-cracks, faulty cells, or poor connections. Qualified solar engineers perform thermal imaging scans, typically costing £150 to £300, and the data provides definitive diagnosis of where problems lie.
Isolated damage may be less obvious. A single panel with a micro-crack continues generating most of its normal output, making the problem hard to detect from monitoring data alone. This is why professional inspection using thermal imaging proves invaluable when you suspect problems but can’t pinpoint them.
What Homeowners Can and Cannot Do
Safety regulations in the UK are strict regarding solar panel work. Grid-connected systems are considered live electrical equipment, and the electrical installation must comply with Building Regulations Part P.
Homeowners can safely perform limited maintenance tasks. Gentle cleaning of panel glass using deionised water and a soft brush or cloth can improve output by 3 to 5 percent, particularly in dusty areas or after seasonal pollen release. However, climbing on roof-mounted systems is dangerous and unnecessary; most soiling reduces output by 2 to 4 percent, and rainfall typically cleans panels naturally.
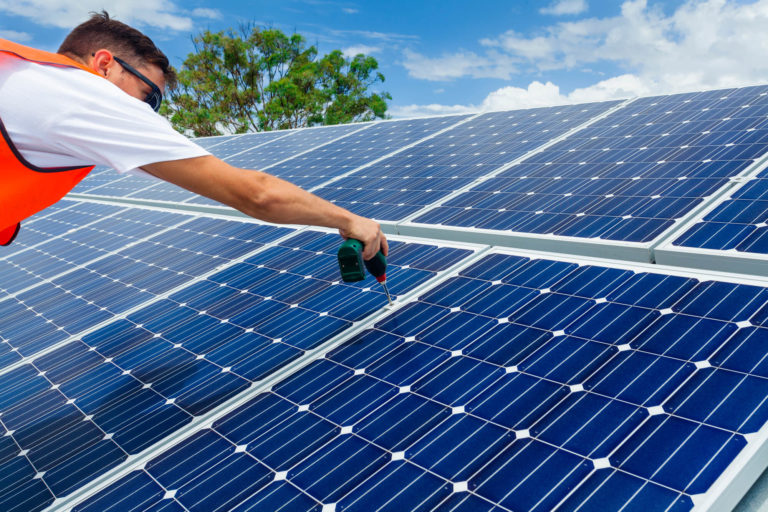
You absolutely cannot attempt repairs yourself. Replacement of panels, inverters, wiring, or electrical connections must be undertaken by installers who are Part P competent and MCS-certified. Attempting DIY repairs voids warranties, risks electrocution or fire (panels can generate 500+ volts even in partial sunlight), and violates grid connection requirements. If your system is grid-connected and you modify it without certification, the Distribution Network Operator can disconnect your system and levy fines.
Your responsibility is monitoring, early detection, and contacting a qualified engineer when problems appear. Report issues immediately rather than attempting repairs or delaying professional attention.
Repair Costs and When Repair Versus Replacement Makes Sense
The economics of repair versus replacement depend on the component’s age and the cost of replacement. As of 2026 in the UK, typical repair costs are:
Inverter replacement costs £1,000 to £2,000 for string inverters and £2,000 to £4,000 for hybrid inverters (those combined with battery systems). This is a straightforward swap, usually completed in a few hours by a qualified electrician. If your inverter fails whilst under warranty (typically 10 years), the cost is usually covered entirely.
Individual panel replacement costs £200 to £400 per panel depending on wattage (typically 400 to 450 watts for modern panels). A complete panel removal and replacement by an installer takes several hours and may cost £400 to £600 labour on top of the panel cost. Therefore, replacing a single 400W panel costs approximately £600 to £1,000 total.
Rewiring or electrical work costs £300 to £600 depending on what’s damaged and how much cabling must be replaced. Corroded connectors can sometimes be cleaned and re-tightened for minimal cost (£100 to £150), whilst full rewiring of a section is more expensive.
The replacement decision hinges on panel age. If a panel is 20+ years old and fails, replacement is sensible because that panel is nearing end-of-life anyway. The remaining operational life is short, so paying £1,000 to extend it another 3 to 5 years offers poor return. However, if the panel is only 10 years old with 15+ years remaining, replacement is justified.
Modern replacement panels are also significantly more efficient than older ones. A new 450W panel generates 15 to 20 percent more electricity than a 15-year-old 350W panel in the same space. For systems where just one or two panels are damaged in a larger array, replacement with modern high-efficiency models actually improves overall system performance.
Identifying Faulty Panels: Thermal Imaging and Electrical Testing
Thermal imaging is the most reliable way to identify problem panels without physical testing. A thermal camera scan of your array takes 30 to 60 minutes and reveals hotspots caused by internal cell faults, micro-cracks, or poor solder connections as bright spots (warmer regions) on the thermal image. A hotspot of 20 to 30 degrees Celsius hotter than surrounding cells indicates a serious fault. Cold spots show panels that aren’t generating as much heat as they should, indicating under-performance, possible micro-cracks affecting multiple cells, or shading issues.
A thermal imaging report typically costs £150 to £300 and provides definitive identification of which panels are faulty and the likely cause. Electrical testing complements thermal imaging. Engineers can measure the current and voltage output of individual panels using bypass diagnostic tools. These tests reveal whether a panel’s electrical output matches its specification. A panel rated 400W should produce very close to 400W under standard test conditions; significantly lower output indicates internal faults. Combined thermal and electrical testing provides complete diagnosis without removing panels from your roof.
Bird Damage and Prevention
Birds nesting beneath roof-mounted panels cause surprisingly common damage. Pigeons, sparrows, and other birds seeking shelter under panels can damage undersides of panels, soil the array, and create pest control issues. Bird droppings are acidic and etch glass if left long-term. Occasionally, birds damage wiring or disconnect cables.
Prevention is far simpler than repair. Mesh screening installed beneath panels (leaving small gaps at edges to allow air flow) prevents birds from nesting whilst allowing the panels to cool. This screening costs approximately £500 to £800 for a typical residential 8-panel system installed by an engineer.
For systems with existing bird nesting, removal and cleanup must be done during appropriate seasons (not during nesting between March and August) and should engage wildlife specialists rather than forcing removal during breeding season. Once birds are removed, installing screening prevents recurrence.
Insurance Claims for Storm Damage
Most UK home insurance policies cover solar panels if they’re declared to your insurer. Storm damage from hail, high winds, or lightning typically falls within standard cover, though you should verify your specific policy.
To make a successful claim, you need photographic documentation of damage, ideally taken immediately after the incident. Keep photos showing the damage clearly and the context of your roof and installation. Your installer’s commissioning report, which includes serial numbers and specifications of panels and inverters, supports claims by proving what you owned.
If you haven’t declared your solar installation to your insurer, claims for solar-related damage will be denied. Similarly, if you added panels after obtaining your policy and didn’t notify your insurer, coverage may not apply. Always inform your home insurance provider when solar is installed and retain a copy of their written confirmation that panels are covered.
Claims for storm damage are usually approved, particularly if damage is photographed and the storm is independently documented (weather service records, local news reports). Claimed amounts typically cover replacement costs. Installers and engineers can provide repair quotes supporting the claim value.
Case Study: Storm Damage and Insurance Recovery in Greater Manchester
Background
A homeowner in the Manchester area installed a 4kW solar panel system (8 x 500W panels) in 2019. The system included a hybrid inverter with battery storage (5kWh capacity). For six years, the system performed reliably, saving the household approximately £600 annually on energy bills and generating £300 to £400 annually in Smart Export Guarantee payments.
Project Overview
In July 2025, a severe thunderstorm with hail and wind gusts exceeding 60 mph struck the area. Hail stones approximately 25 to 30 millimetres in diameter damaged three of the eight panels, with visible cracks visible through the panel glass. Additionally, lightning struck nearby, causing a voltage spike that damaged the hybrid inverter. The system stopped generating entirely.
Implementation
The homeowner immediately photographed the damaged panels and contacted their home insurance provider with claim documentation. They also called a local MCS-certified installer to obtain repair quotes. The installer reported that repair required replacement of the three cracked panels (£1,500 including labour) and replacement of the inverter (£2,800 including labour), totalling £4,300. The insurance company approved the claim within two weeks, authorising payment for the repair. The homeowner selected the installer’s quote, and work was completed within one month.
Results
The system was fully restored to its pre-storm output capacity. The homeowner’s insurance covered the entire £4,300 cost, with no excess applied (the policy had a £250 excess but the insurer waived it given the clear documentation of storm damage). The system resumed generating electricity immediately post-repair and has operated normally for the following months. This demonstrates the value of both comprehensive insurance coverage and prompt documentation of damage.
Expert Insights From Our Solar Panel Installers About Repair and Maintenance
One of our senior solar installation engineers, with over 18 years of experience, offered perspective on panel repairs: “The biggest mistake homeowners make is delaying repairs after damage is detected. A single cracked panel doesn’t stop your entire system, so people sometimes ignore it, thinking it’s a minor issue. But that crack exposes the internal structure to moisture infiltration, and within a few months, degradation accelerates dramatically. A panel repaired within weeks of damage typically recovers most of its function; one left alone for a year may be beyond economical repair. Additionally, thermal imaging is so powerful for diagnosis that it should be the first step whenever performance drops unexpectedly. It eliminates guesswork and pinpoints exactly which panels have problems. I recommend all homeowners get a thermal scan every five to ten years as preventative assessment, even if performance seems fine. Early detection of micro-cracks saves money over the system’s lifetime.”
Finding an MCS-Certified Repair Specialist
Repairs must be conducted by installers certified under the Microgeneration Certification Scheme (MCS) or equivalent scheme (Renewable Energy Consumer Code, RECC). Our guide to MCS-approved installers can help you find qualified engineers in your area. Look specifically for installation companies holding MCS certification for your system type (PV for panels, or MCS-listed battery installers if you have storage).
Qualified specialists will provide transparent quotes with itemised labour and parts costs, perform thermal imaging to diagnose problems accurately, explain repair options and cost-benefit of repair versus replacement, use genuine replacement parts and high-quality materials, provide written warranty on repair work (typically 5 to 10 years), and register the repair with MCS to maintain system certification and grid connection compliance. A repair completed by an unqualified electrician may cause the DNO (Distribution Network Operator) to disconnect your system from the grid until a certified engineer re-inspects and signs off on the work. Always choose qualified professionals.
Frequently Asked Questions
Can a cracked solar panel still generate electricity?
Yes, a solar panel with a single crack can continue generating electricity unless the crack severs an entire cell or a major electrical connection. However, the crack compromises weather protection, and moisture will eventually infiltrate, causing accelerated degradation. A cracked panel should be repaired or replaced within weeks rather than allowed to deteriorate slowly.
How long do solar inverters last?
Most string inverters last 10 to 15 years, though some reach 20 years with good luck. Hybrid inverters (combined with battery systems) typically last 10 to 15 years for the inverter component, though battery warranties often extend to 10 years separately. Most solar systems require inverter replacement during the 25 to 30-year lifetime of the panels themselves.
What is a hotspot in solar panels?
A hotspot is a localised area of a panel that generates significantly more heat than surrounding regions. Hotspots indicate internal electrical faults, micro-cracks, or poor solder connections, and appear as bright spots on thermal images. They reduce panel output and can damage other components if left uncorrected. Thermal imaging reliably identifies hotspots.
Can I repair solar panels myself?
No. UK regulations require that grid-connected solar systems be maintained and repaired only by Part P competent, MCS-certified installers. Attempting DIY repairs voids warranties, risks electrocution (panels generate 500+ volts), and violates grid connection requirements. The DNO can disconnect your system if unauthorised modifications are discovered.
How much does panel replacement cost in the UK?
Individual panel replacement costs £200 to £400 per panel (depending on wattage) plus £200 to £300 labour per panel, totalling approximately £400 to £700 per panel. A complete replacement of a single faulty panel in a larger array costs £600 to £1,000 installed. Modern replacement panels are more efficient than older ones, so replacement can improve overall system output.
Does home insurance cover solar panel damage?
Most UK home insurance policies cover solar panels if they are declared to your insurer at installation. Storm damage from hail, high wind, or lightning typically falls within standard cover. You must inform your insurance provider when panels are installed and retain written confirmation of coverage. Undeclared panels or panels added after the policy was taken out may not be covered.
What is thermal imaging of solar panels?
Thermal imaging uses an infrared camera to visualise heat distribution across your solar array. Hotspots indicate faulty panels; cold spots indicate underperformance. Thermal imaging can identify micro-cracks, poor connections, and failing cells without removing panels. A professional thermal imaging assessment costs £150 to £300 and provides definitive diagnosis of problems.
How can I prevent bird damage to my solar panels?
Mesh screening installed beneath panels prevents birds from nesting whilst allowing air circulation. Installation costs approximately £500 to £800 for a typical residential system. Once screening is installed, birds cannot access undersides of panels, eliminating nesting damage, soiling, and pest issues. Screening is the most effective prevention method.

Summing Up
Solar panels are resilient but not invulnerable. Damage from storms, manufacturing defects, and age-related degradation does occur, and early detection combined with professional repair is essential. Regular monitoring through your system’s app, occasional thermal imaging assessment, and prompt professional repair when issues appear will keep your system performing optimally throughout its 25 to 30-year operational lifetime.
The investment in professional assessment and repair is worthwhile given the value of maintaining a system that generates £3,000 to £5,000 annually in savings and export income. Insurance coverage and manufacturer warranties support repair costs, and MCS-certified installers ensure repairs are properly executed and registered. Never attempt DIY repairs; always engage qualified professionals. If your system shows signs of damage or degraded output, contact an MCS installer immediately for assessment and repair.
Updated